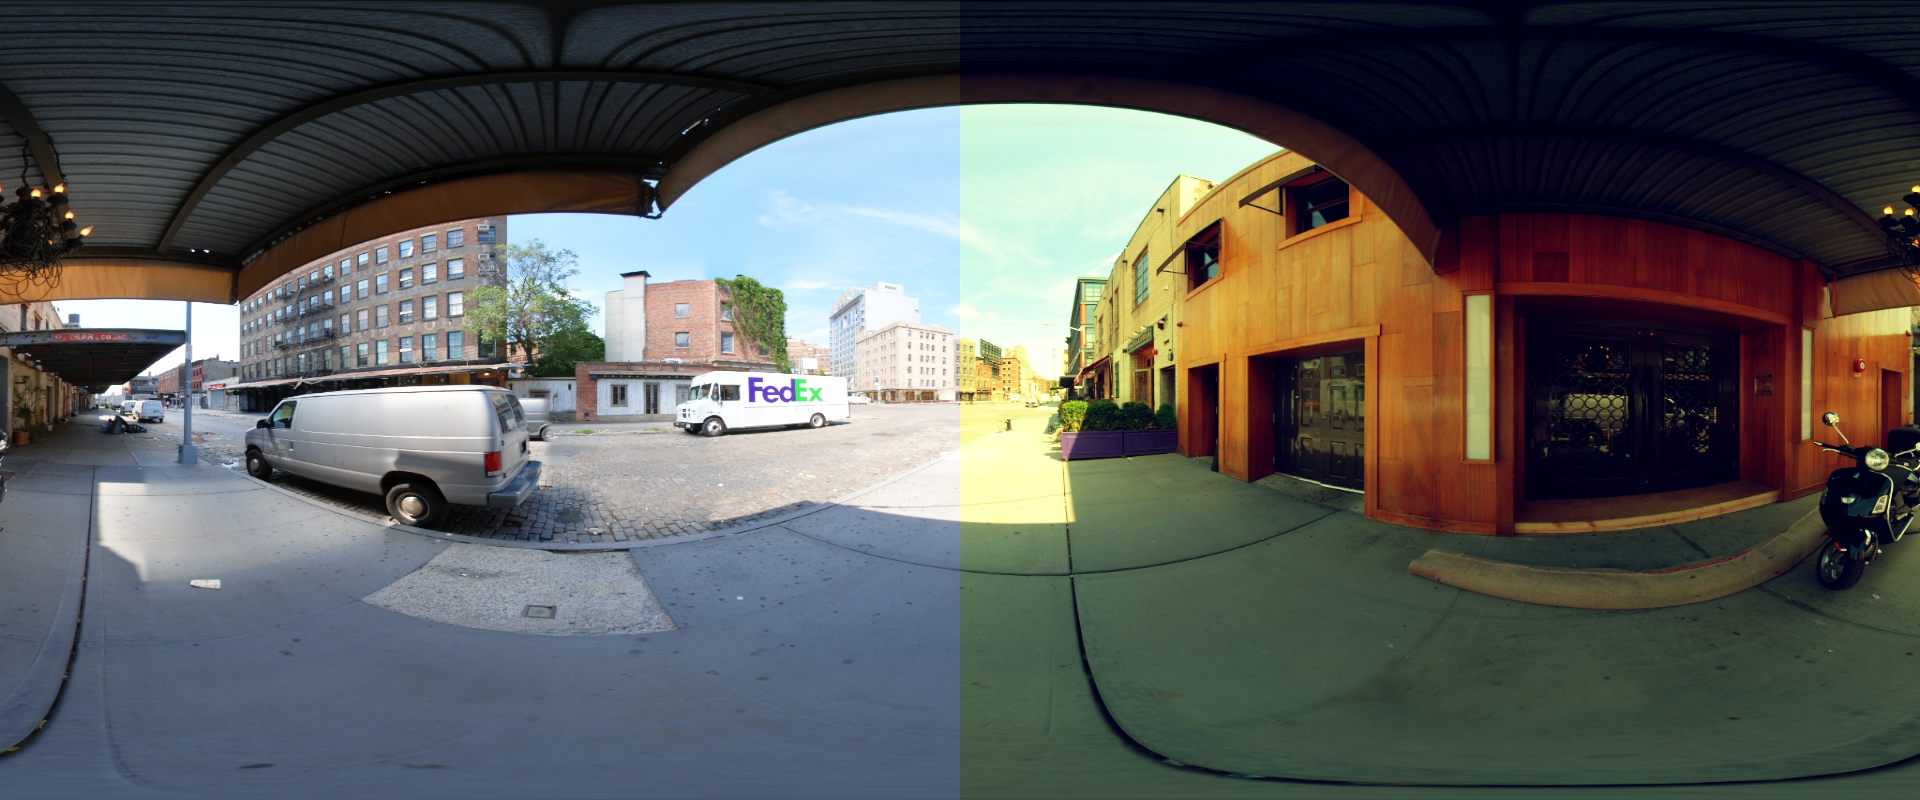
As you have probably noticed, there are a lot of color correction algorithms out there. It can be a bit daunting to figure out the best combination of tools to use on a given project. I’ve personally gone through many iterations of trying different things in different orders and over time I’ve settled on a few key features.
Color correction is subjective, so there is no correct way to do it. But the operations listed here are (IMO) a reasonable starting point. You can also bake the curve into a LUT which makes the cost of the individual operations mostly irrelevant.
Btw, the image used in these examples is the “Wooden Door” from Christian Bloch’s sIBL Archive. If you need some HDR environment maps, they are highly recommended. If you would prefer to make your own HDR environmeent maps, you should buy his book: The HDRI Handbook 2.0.
In order, the tools we’ll go over are:
- Exposure
- Color Filter
- Saturation
- Log-Space Contrast
- Filmic Tone Curve
- Display Gamma
- Lift/Gamma/Gain
Then we’ll go over implementing and optimizing these steps, as well as baking them into a LUT.
Exposure and Color Filter
Exposure is the simplest curve, as it just affects the overal brightness of the scene. The most common way to represent exposure is with F stops, where each step represents a power of 2. So an exposure value of 0 means you multiply your scene intensity by 2^0=1.0. An exposure of 3 would multiply the scene intensity by 2^3=8. An exposure of -2 would multiply the scene by 2^(-2)=.25. You get the idea. Here are several different exposure adjustments applied prior to the filmic curve.
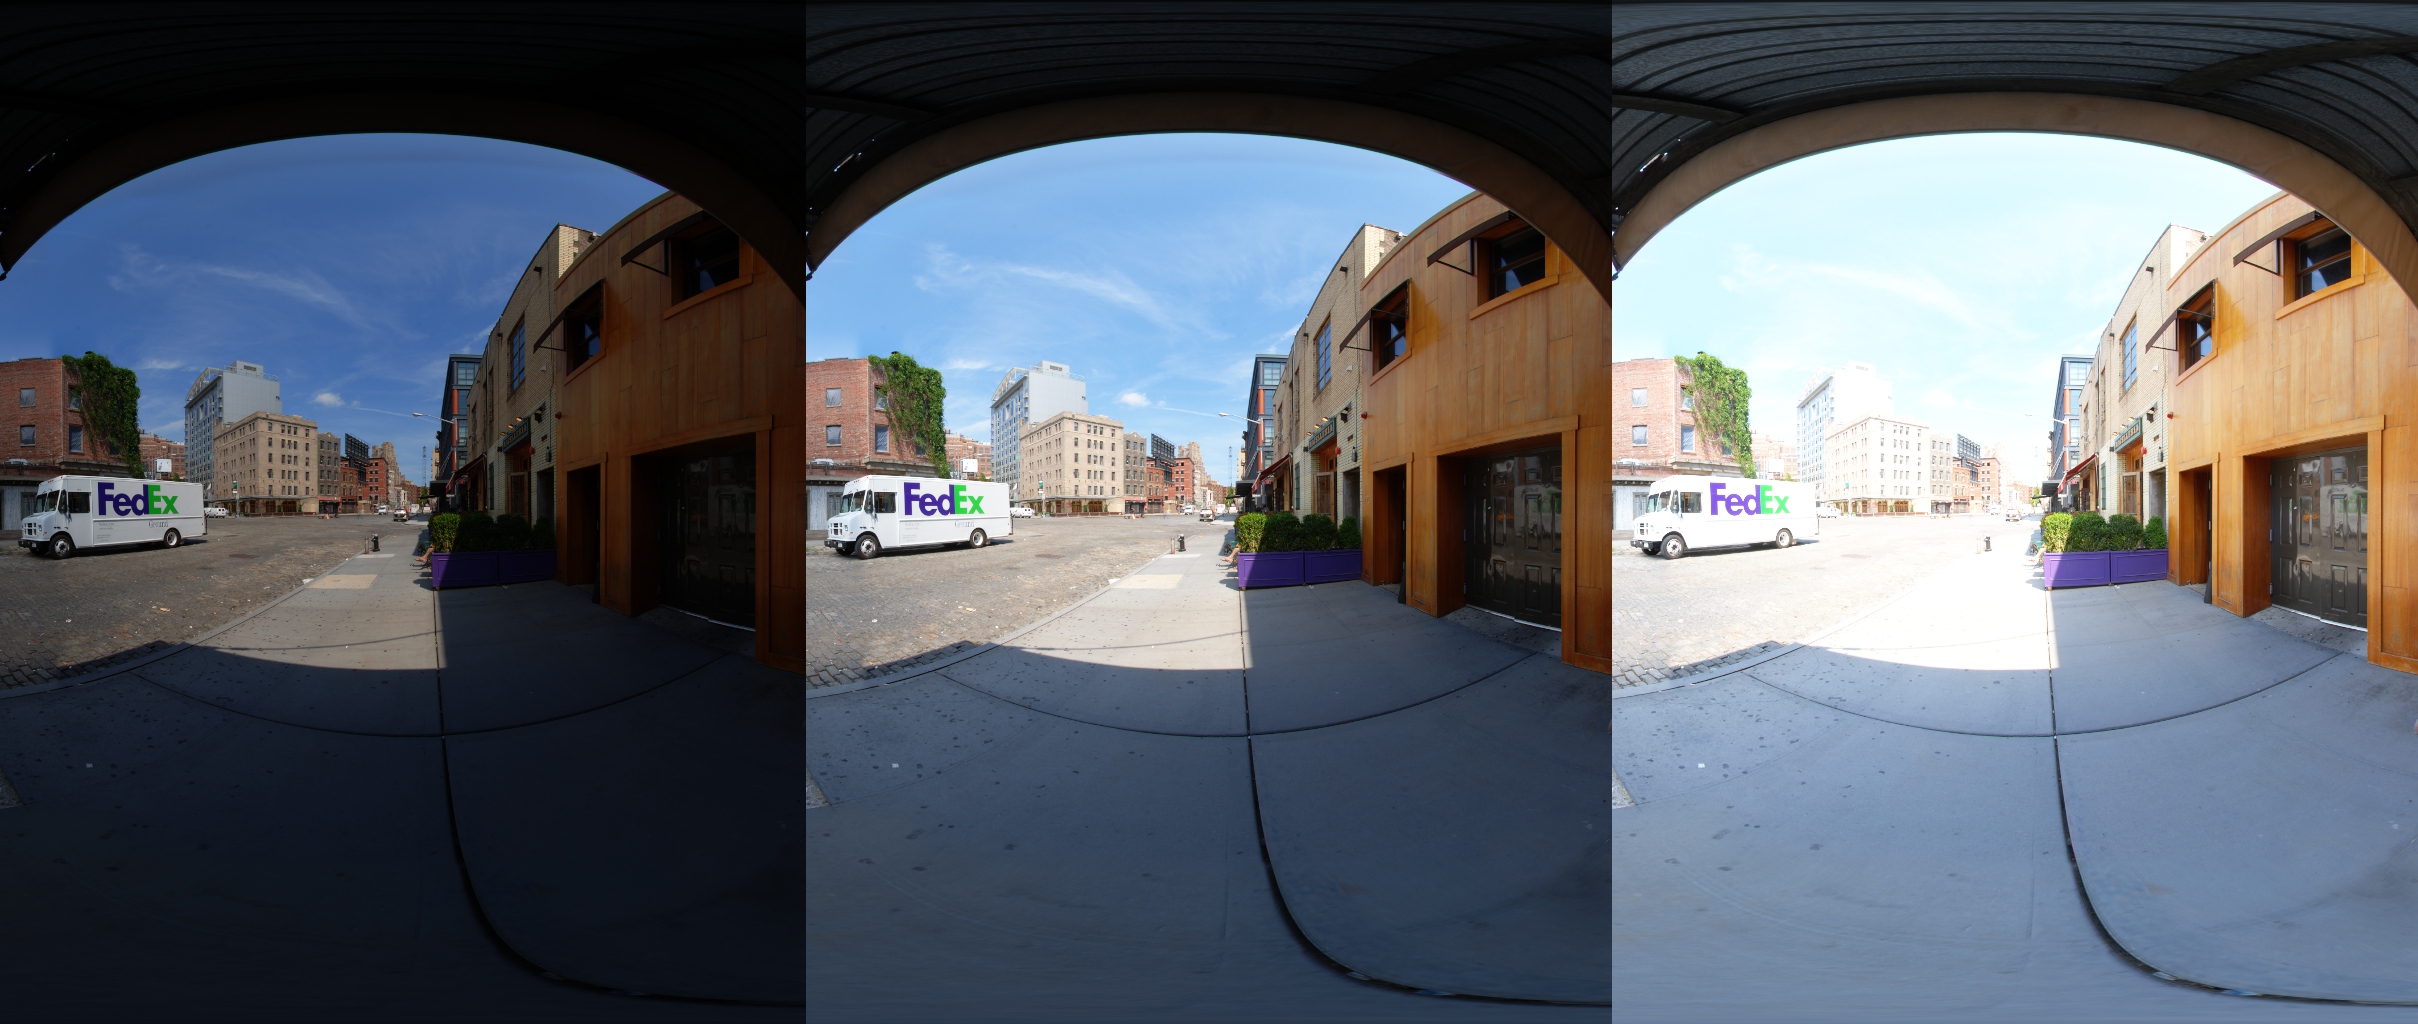
Exposure
The second operation we need to perform is a color filter. It’s a fancy way of saying that you mutliply the scene by a color. For implementation, we would of course combine the color filter and exposure operations into a single multiplier.
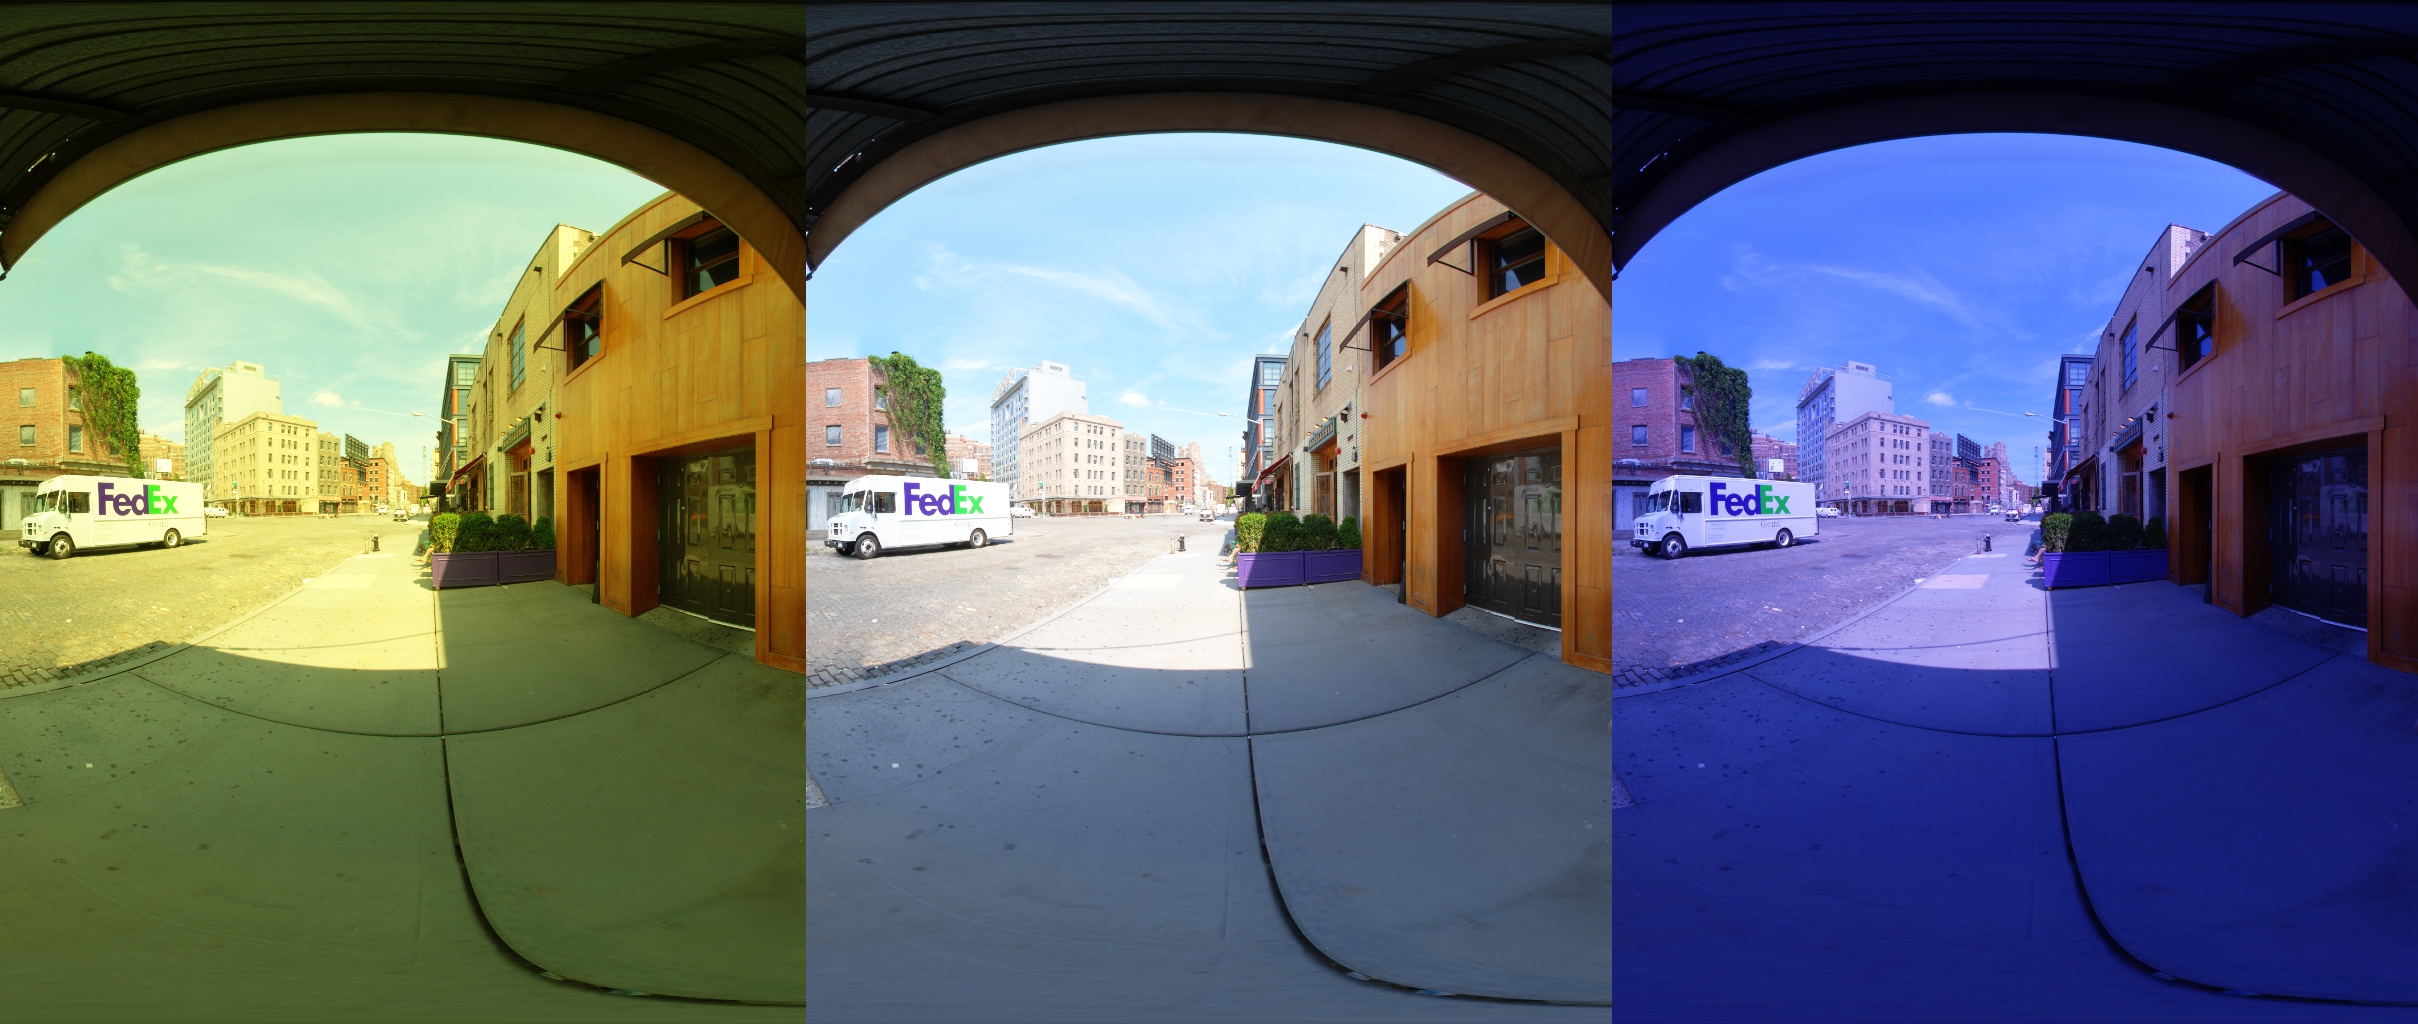
Color Filter
The final implementation looks something like this:
float3 exposureColorFilter = exp2f(exposure)*colorMult;
Saturation
Saturation is another simple operation, which is just a lerp between the original image and the grey scale version. There are differing opinions on how to convert to grey scale since the eye is more sensitive to green than it is red or blue. There has been a ton of research on the best way to weight the RGB channels to match the same perceptual intensity, and typical numbers are around R=.30,G=.59,B=.11. Feel free to read the Wikipedia page on Luma for more info.
I’ve found that in video games we do not really care about matching the exact perceptual luminance, and true perceptual weights can shift certain colors around more than desirable. So I generally use the numbers R=.25,G=.50,B=.25.
The formula is as follows:
float3 lumaWeights = float3(.25,.50,.25);
float3 grey = dot(lumaWeights,rgbVal)
float3 ret = grey + saturation(rgbVal-grey);
Here is an example of pushing and pulling saturation.
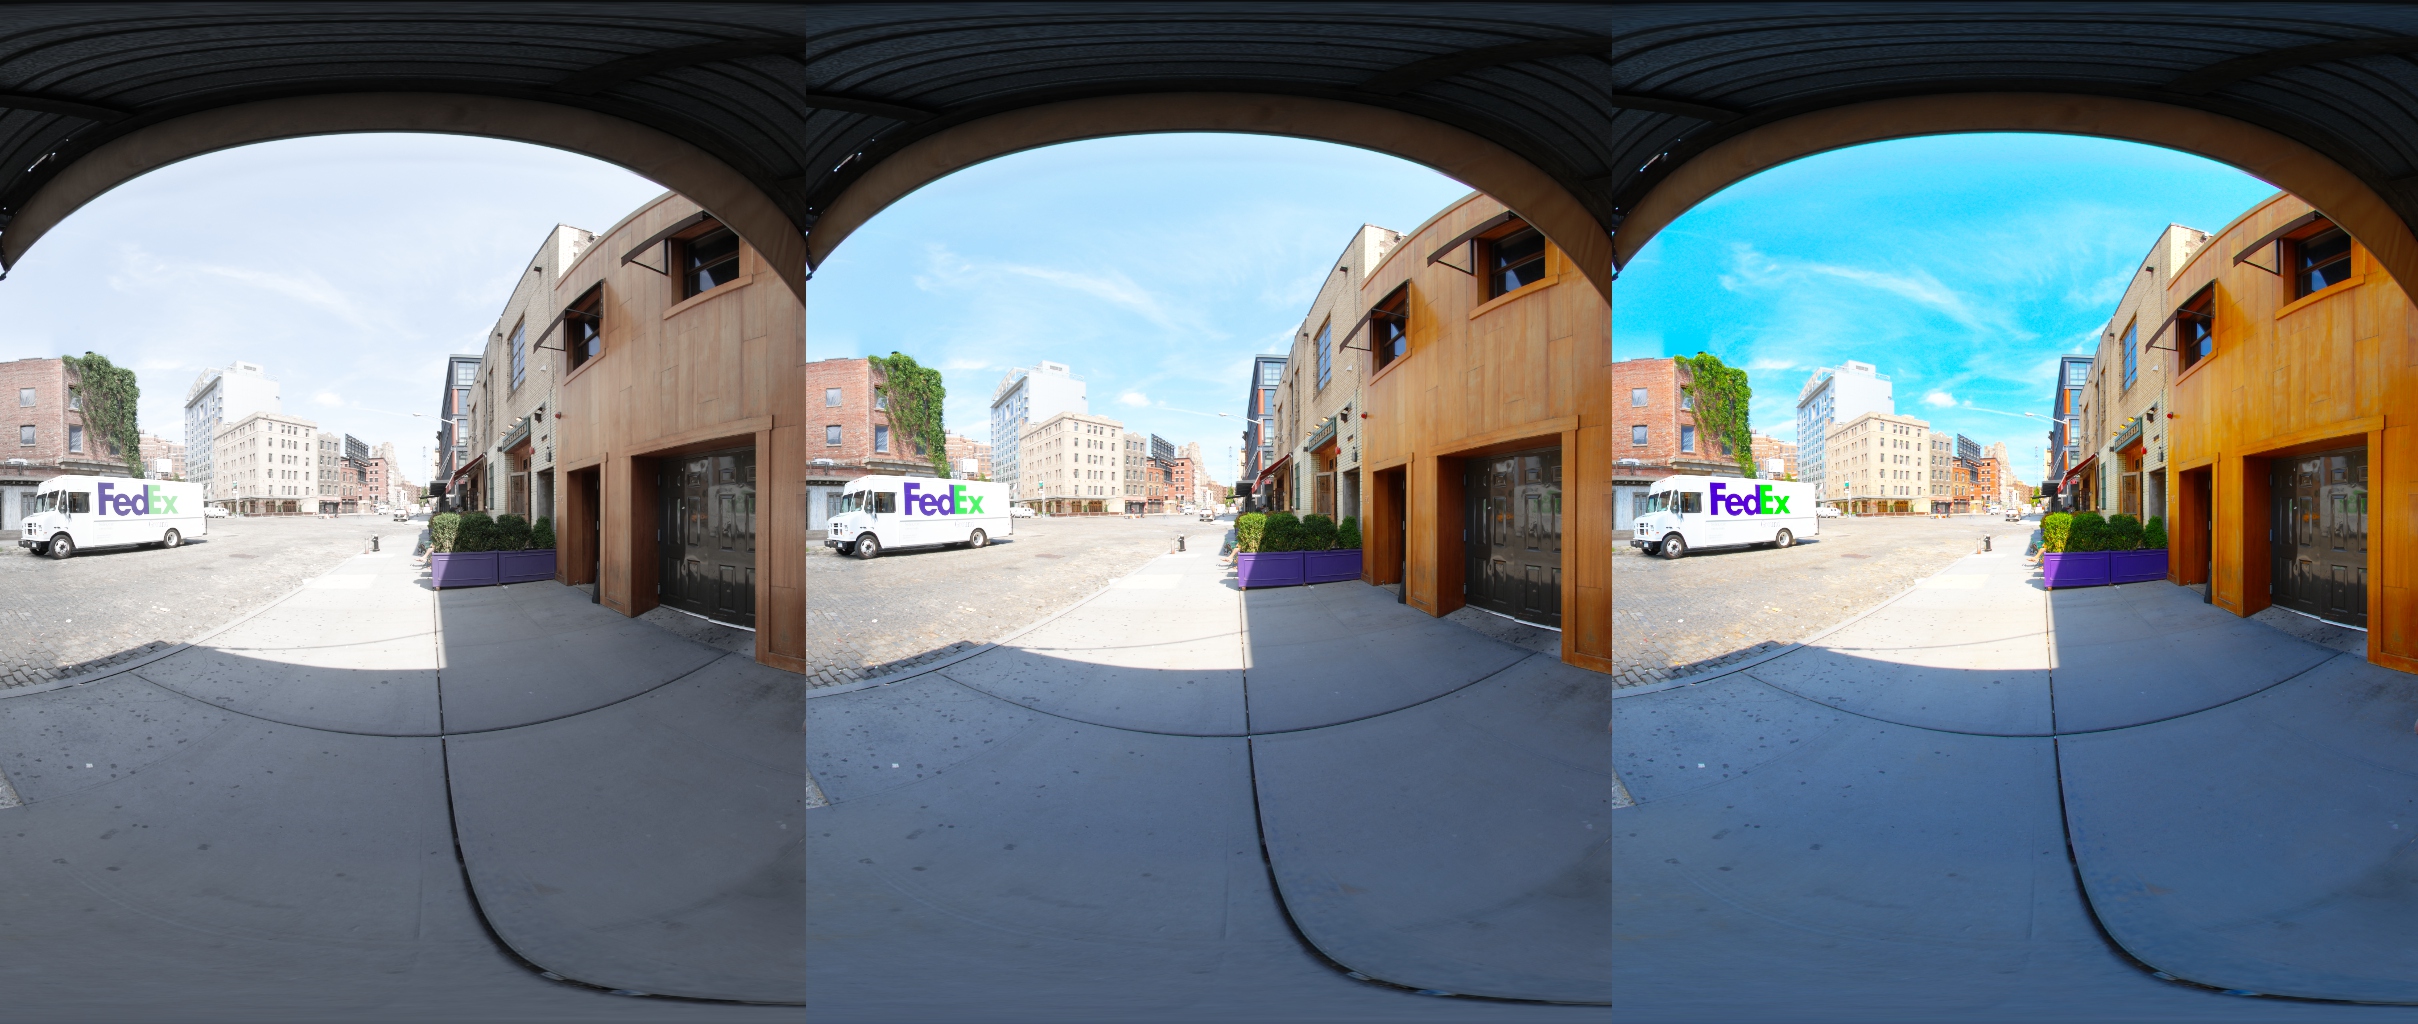
Saturation
Contrast and Filmic Curve
With contrast things start to get interesting. The standard contrast operation simply pushes values away from grey, like so:
float3 grey = 0.5
float3 result = grey + (color-grey)*contrast;
The major problem with this approach is clamping. As you increase the contrast, the values tend to clamp out because values are pushed past zero. We also have white clamping problems as values push past 1.0.
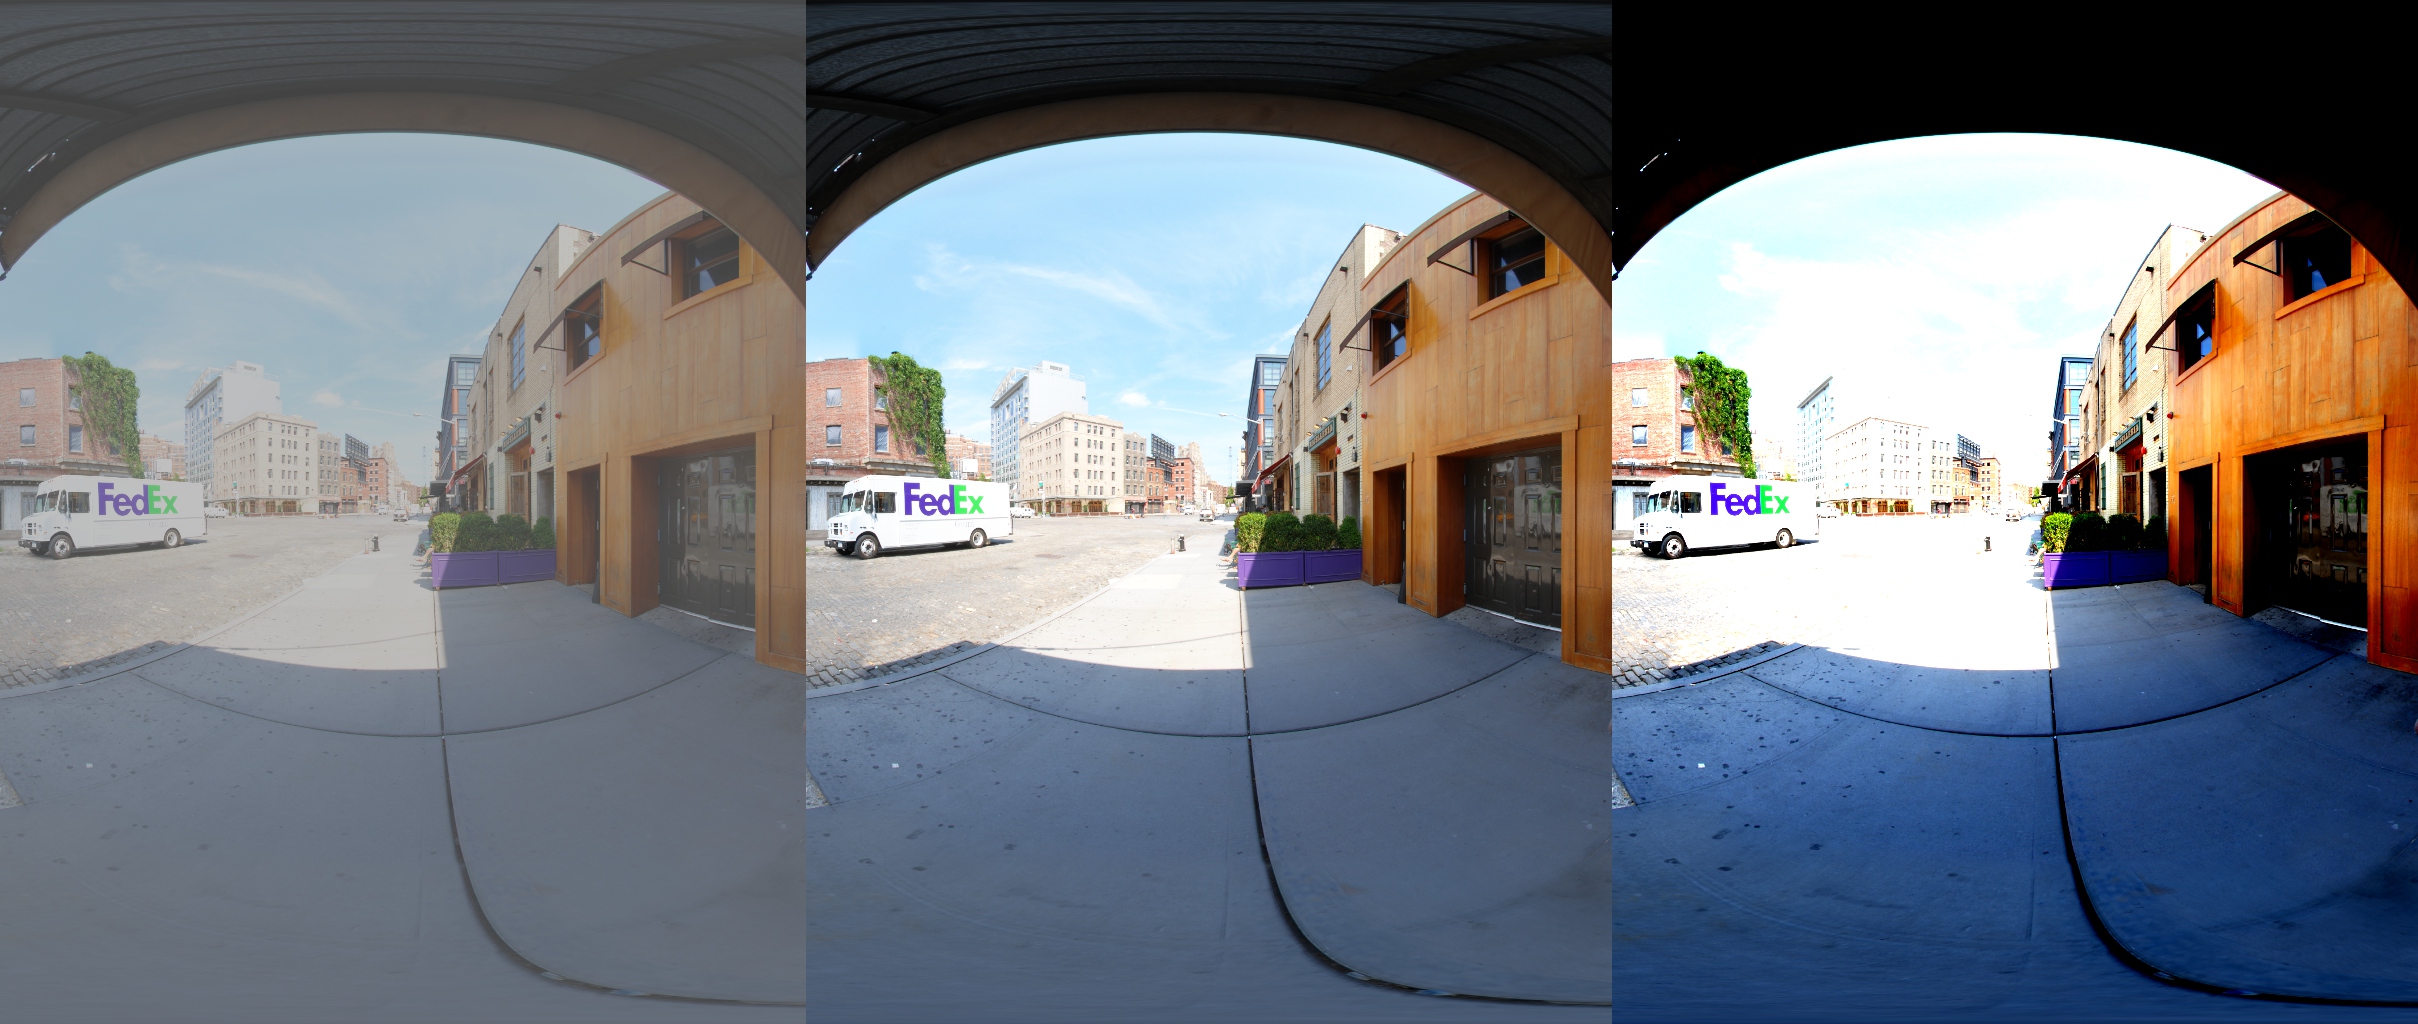
Linear Contrast
There are two fixes we can make here. The first tweak is to apply the contrast operation before the filmic curve which has a shoulder. This fixes most of our white clamping issues. As we push overexposed values the shoulder brings them back into range.
The second tweak we can make is to apply the value in log space, which fixes the clamping in the blacks. The function involves converting your linear RGB to log, applying a contrast, and converting back to linear. Your log values can go negative but no matter how far you push them they will never go past zero, which preserves detail in the shadows/blacks.
Here is a comparison of the main image with log-space contrast applied before the filmic curve. Note that detail in the shadows is preserved.
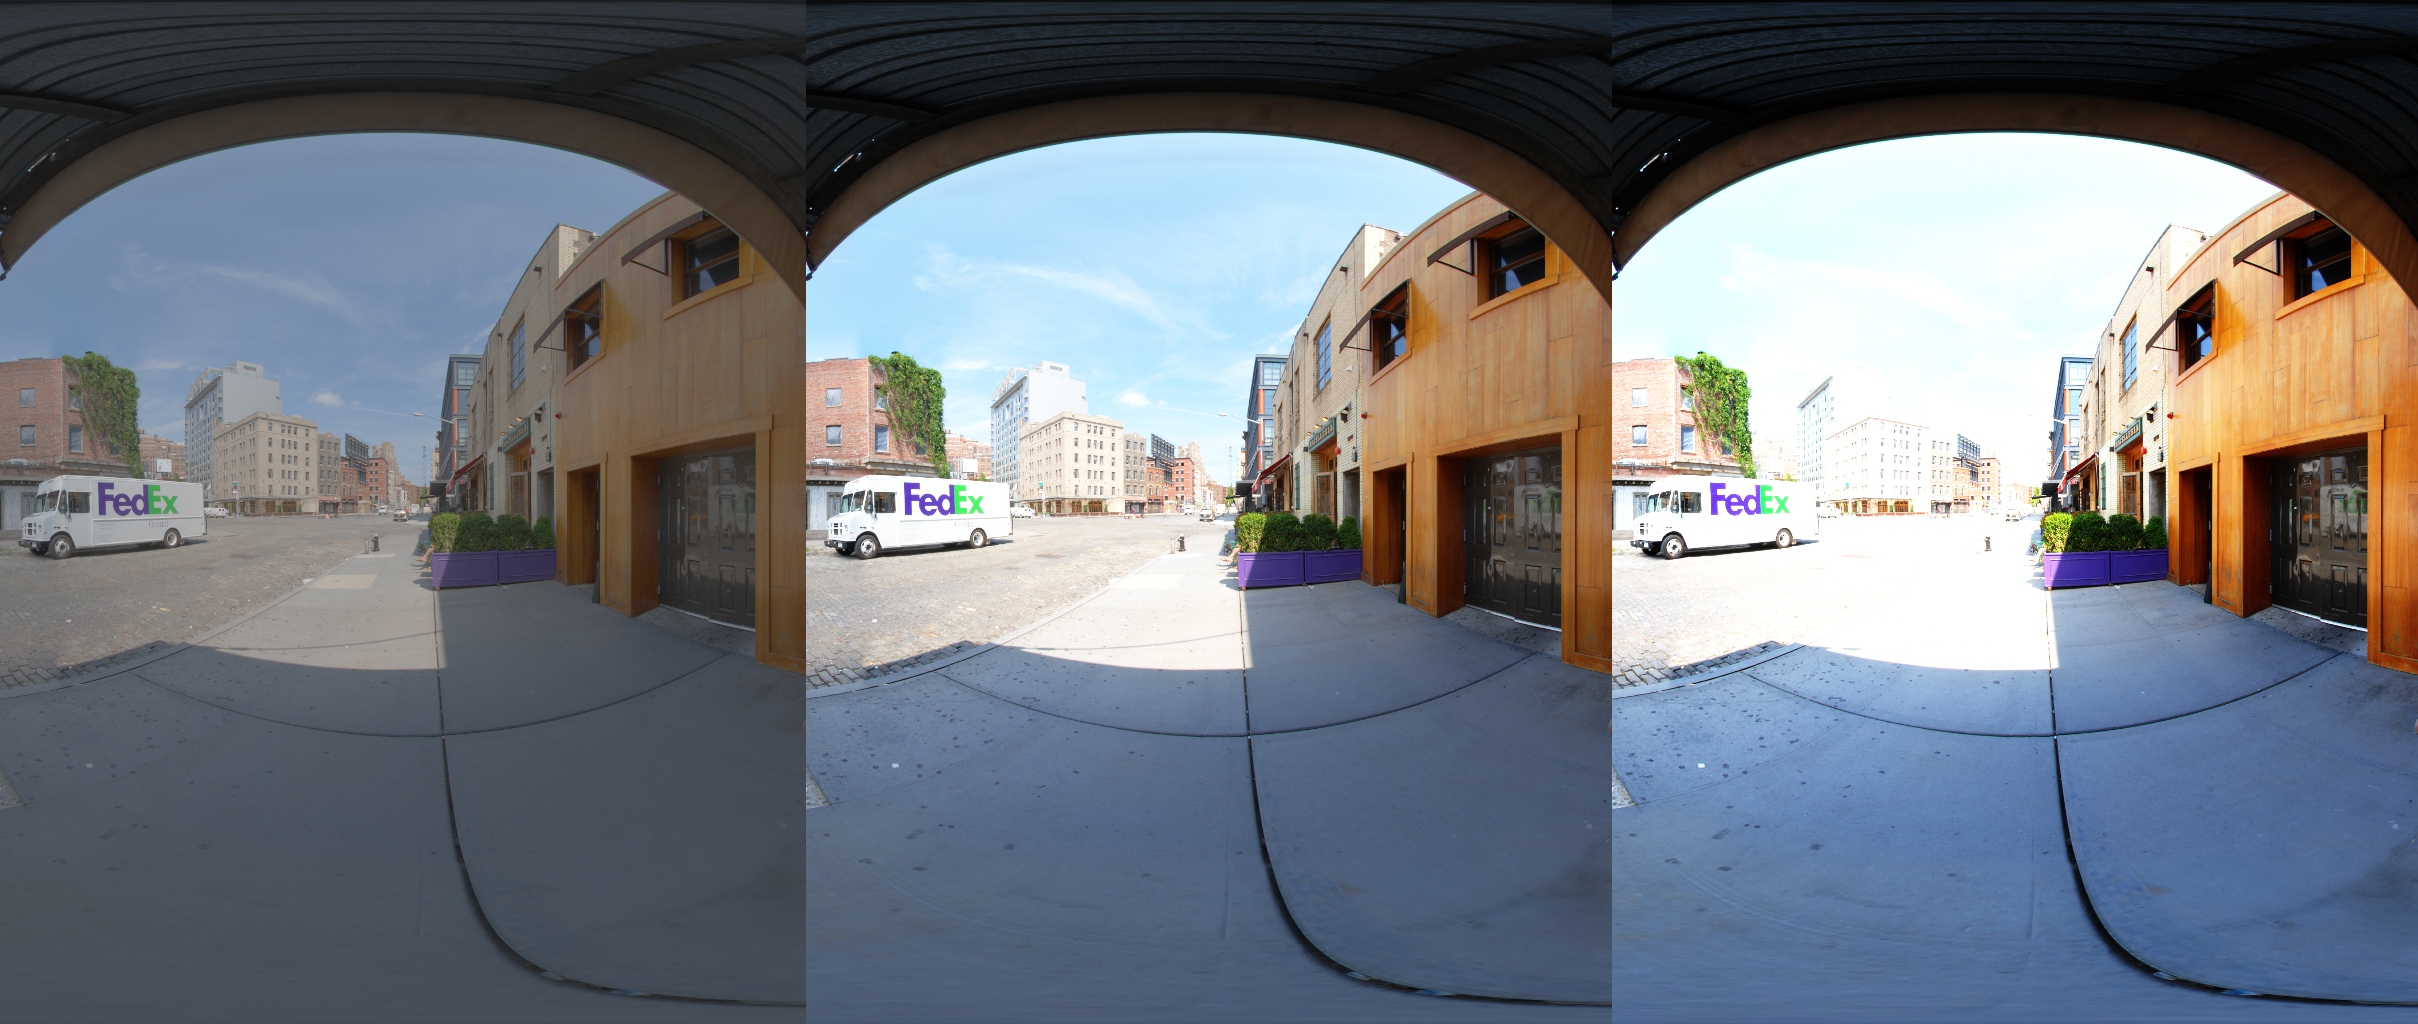
Log Contrast before Filmic Curve
And here is the code. We need the epsilon so that our linear value of 0 is well behaved. logMidpoint is the log of our linear midpoint which I usually hardcode to 0.18.
static float EvalLogContrastFunc(float x, float eps, float logMidpoint, float contrast)
{
	float logX = log2f(x+eps);
	float adjX = logMidpoint + (logX - logMidpoint) * contrast;
	float ret = MaxFloat(0.0f,exp2f(adjX) - eps);
	return ret;
}
Filmic Curve
Of course, we should also apply a filmic cure. Details in the previous post: Filmic Tonemapping with Piecewise Power Curves.
Display Gamma
After converting to a filmic curve, we need to convert to display gamma, which is usually 2.2, unless that display gamma is convolved into the filmic curve. It’s as simple as:
float3 outputColor = pow(filmicColor,1.0/2.2);
We can convolve the gamma curve into the filmic curve at a slight loss of accuracy. If you need to apply the curve as a function in a shader it can save you a few instructions. However, if you are baking everything into a LUT, the cost is irrelevant and you should stick with a separate gamma function.
Lift/Gamma/Gain
Lift/Gamma/Gain goes by many different names is the most well known color correction algorithm from the film world. In fact, one of the biggest online forums for color correction is LiftGammaGain.com. For a more thorough explanation of the tools in Nuke, you can go to http://www.qvolabs.com/nuke_color_correction_basic.html.
The concept is pretty simple. All parameters affect the entire curve, but lift primarily affects shadows, gamma primarily affects the midtones, and gain primarily affects highlights. So you can move those three colors around and tweak shadows, midtones, and highlights separately.
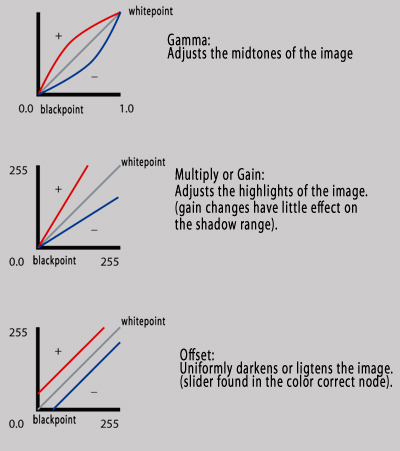
There are several variations, but the one I’ll use does gamma before lift and gain. I prefer to apply gamma first, and then use it as a lerp between the shadow and highlight color. It’s just Lift/Gamma/Gain with a slightly different interface.
dstColor = lerp(shadows,highlights,pow(srcColor,gamma))
The most common interface for using Lift/Gamma/Gain is color wheels. I grabbed this iamge from Tao of Color.
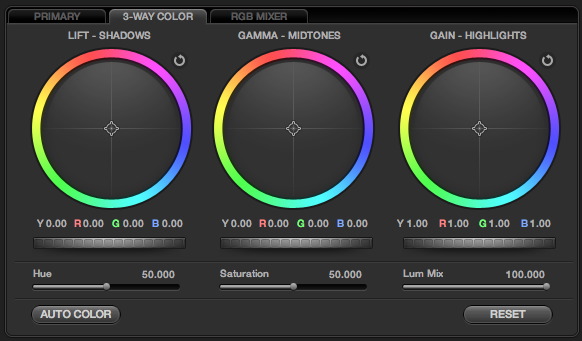
What you might not know is that the levels tool in Photoshop/After Effects/Premiere Pro/Lightroom/etc. is actually the same operation with a different interface. You just have to tweak the RGB channels separately.
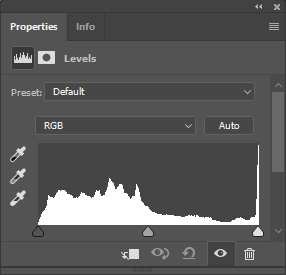
In Photoshop, you can select the shadow, midtone, and highlight color with the eyedropper, then it calculates Lift/Gamma/Gain values under the hood and applies the curve.
How does that math work? We have a function of the form:
f(x) = lift + gain*(x^(1/gamma));
f(0.0) = S; // shadows
f(0.5) = M; // midtones
f(1.0) = H; // highlights
Then we can trivially find our lift, gamma, and gain values, and that is the formula for Lift/Gamma/Gain. We have another problem though: Finding the right interface.
The typical interface is three color wheels. You can also use the levels tool, although it is a pain to use for delicate correction because you have to constantly shift back between the RGB panels. You can also buy one of these add ons: Blackmagic Design DaVinci Resolve Micro Panel. Be warned: If you click that link the ads will stalk you all over the internet.
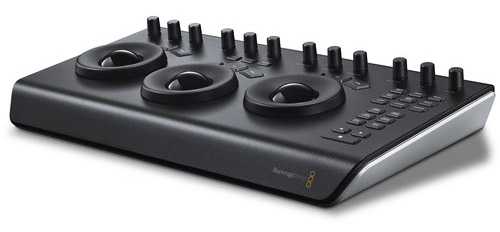
Historically, professional colorists use color wheels. But you should never do something just because film does it. What are the real UI benefits of a physical color wheel? I can see several:
- A large trackball, which gives you precise, subpixel control of your colors.
- In addition to the two axis of left/right and forward/backward, you can also rotate around the vertical axis. You get three degrees of freedom.
- A colorist can make all controls by feel without moving his or her eyes away from the screen.
Those are sensible reasons to use a physical color a wheel, but they don’t really translate to using a color wheel interface on screen using a mouse for input. A color wheel is a fancy way of just choosing a color, so IMO any reasonable color picker will do.
The one extra trick is it helps to have luminance as a separate control. I.e. moving the color should not change the luminance of the chosen color. So in my example, I have a separate control for Shadow/Midtone/Highlight Color, and a Shadow/Midtone/Highlight Offset which only affects luminance. Here is the full code to convert between the user inputs and the actual values used in the formula.
Vec3 liftC = (userParams.m_shadowColor);
Vec3 gammaC = (userParams.m_midtoneColor);
Vec3 gainC = (userParams.m_highlightColor);

float avgLift = (liftC.x+liftC.y+liftC.z)/3.0f;
liftC = liftC - avgLift;

float avgGamma = (gammaC.x + gammaC.y + gammaC.z)/3.0f;
gammaC = (gammaC - avgGamma);

float avgGain = (gainC.x+gainC.y+gainC.z)/3.0f;
gainC = (gainC - avgGain);

rawParams.m_liftAdjust  = 0.0f + (liftC  + userParams.m_shadowOffset   );
rawParams.m_gainAdjust  = 1.0f + (gainC  + userParams.m_highlightOffset);

Vec3 midGrey = 0.5f + (gammaC + userParams.m_midtoneOffset  );
Vec3 H = rawParams.m_gainAdjust;
Vec3 S = rawParams.m_liftAdjust;

rawParams.m_gammaAdjust.x = logf((0.5f-S.x)/(H.x-S.x))/logf(midGrey.x);
rawParams.m_gammaAdjust.y = logf((0.5f-S.y)/(H.y-S.y))/logf(midGrey.y);
rawParams.m_gammaAdjust.z = logf((0.5f-S.z)/(H.z-S.z))/logf(midGrey.z);
The code to actually apply that correction is as follows:
float FilmicColorGrading::ApplyLiftInvGammaGain(const float lift, const float invGamma, const float gain, float v)
{
	// lerp gain
	float lerpV = Saturate(powf(v,invGamma));
	float dst = gain*lerpV + lift*(1.0f-lerpV);
	return dst;
}

Vec3 FilmicColorGrading::EvalParams::EvalLiftGammaGain(Vec3 v) const
{
	Vec3 ret;
	ret.x = ApplyLiftInvGammaGain(m_liftAdjust.x,m_invGammaAdjust.x,m_gainAdjust.x,v.x);
	ret.y = ApplyLiftInvGammaGain(m_liftAdjust.y,m_invGammaAdjust.y,m_gainAdjust.y,v.y);
	ret.z = ApplyLiftInvGammaGain(m_liftAdjust.z,m_invGammaAdjust.z,m_gainAdjust.z,v.z);
	return ret;
}
You can check out the source code for more details, of course. Here is an example of pushing the values farther than you should probably go.
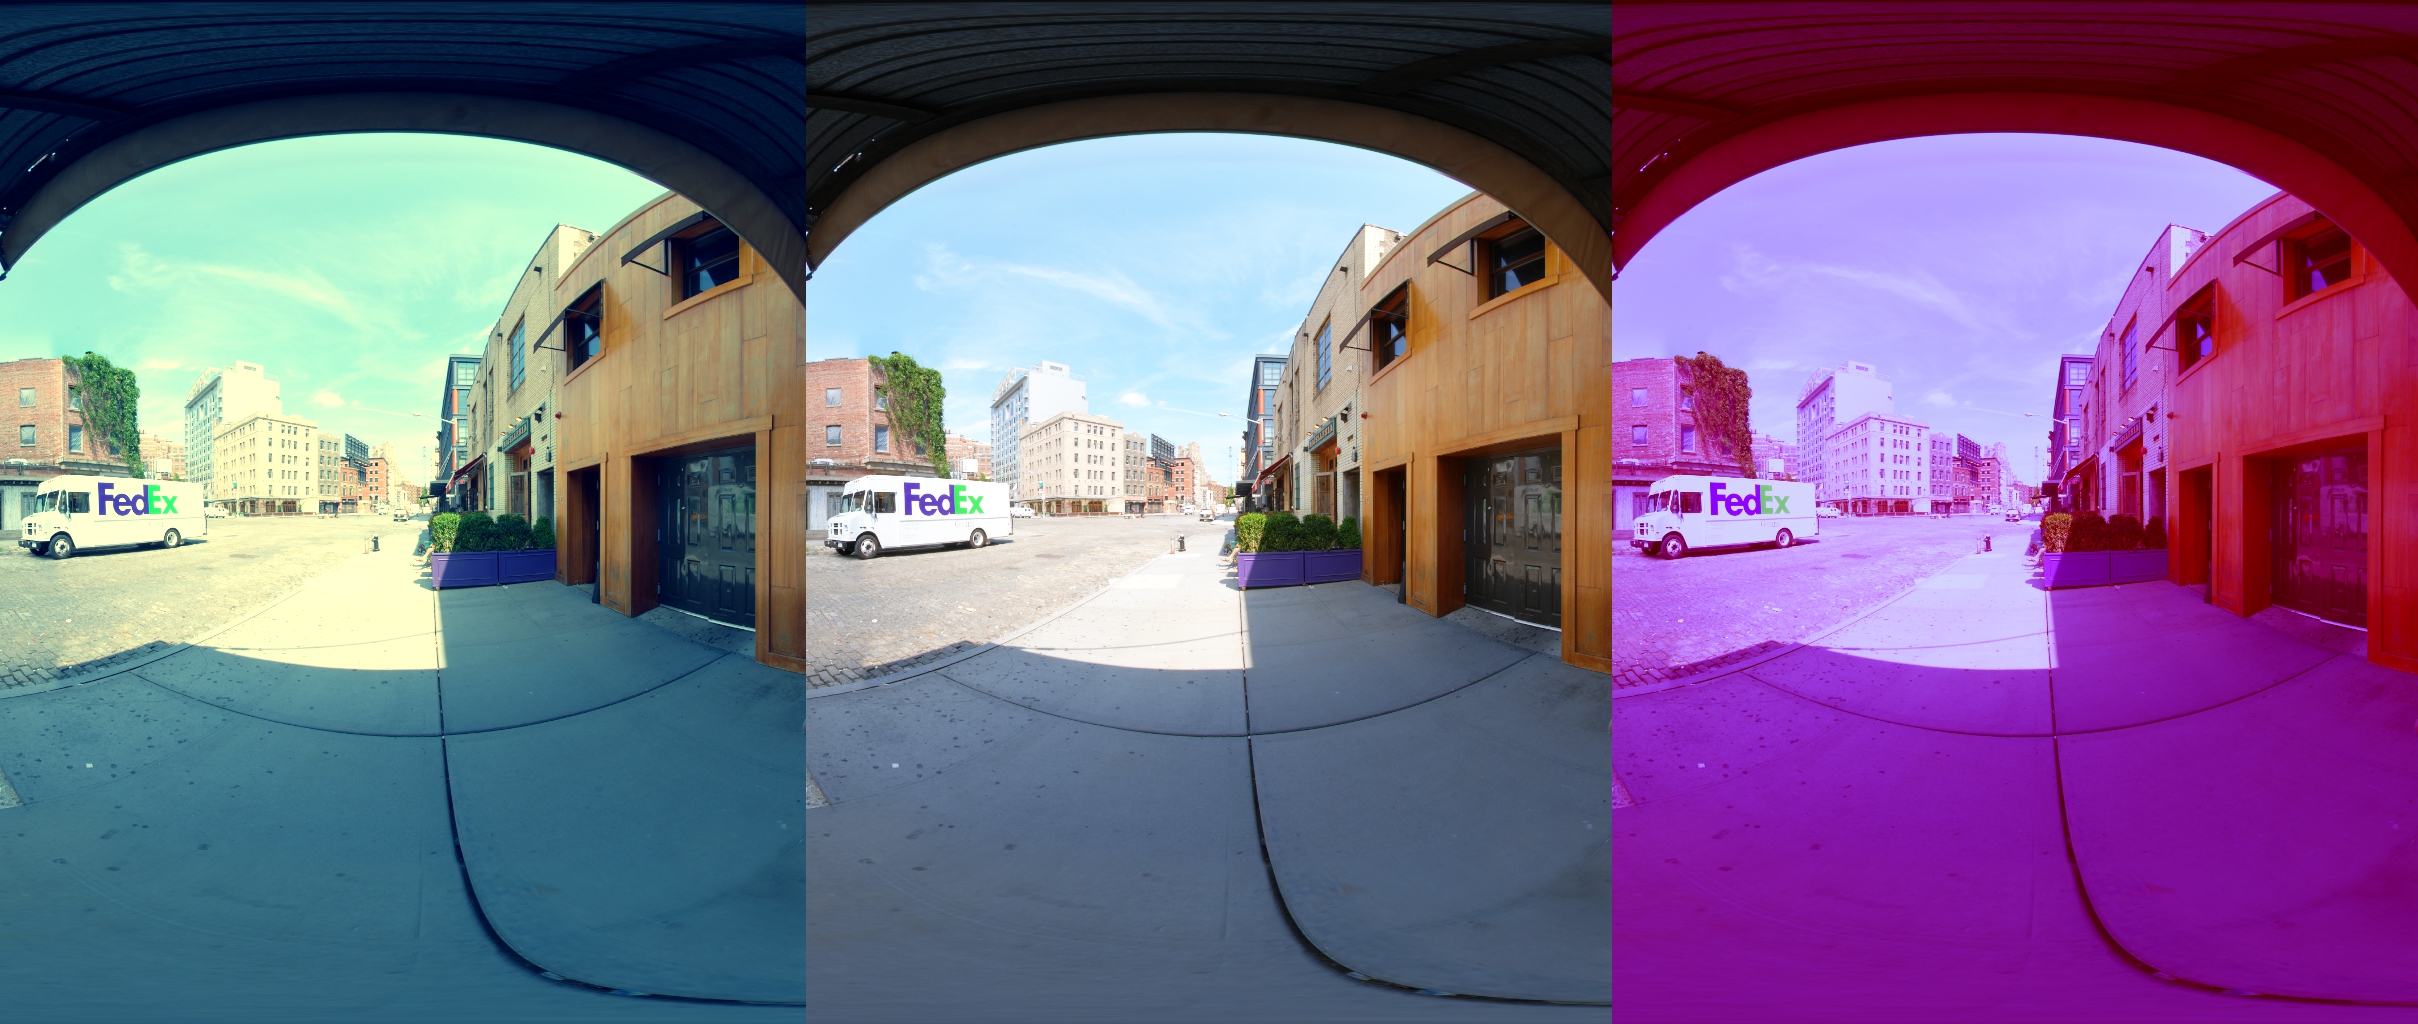
Lift/Gamma/Gain
LUT Baking
To speed up the process, we can convert most of these operations into a lut. We can do these operations easily:
- Exposure
- Color Filter
- Saturation
And then bake these operations into a LUT.
- Log-Space Contrast
- Filmic Tone Curve
- Display Gamma
- Lift/Gamma/Gain
One obvious issue is going to be dynamic range. If we take these combined operations and bake them into a curve we will have way too much precision in the whites and not enough in the blacks. In the original filmic tonemapping curve, HP used the cineon node which as linear to log conversions. But if all we want to do is compress the range a simple sqrt(x) or sqrt(sqrt(x)) is usually enough.
Here is the C++ version. In a shader, the ApplySpacingInv() function would just be sqrt(x) or sqrt(sqrt(x)). SampleTable() is effectively a tex2D, although you have to add a half pixel pad so that your lookup starts and ends at the right place.
Vec3 FilmicColorGrading::BakedParams::EvalColor(const Vec3 srcColor) const
{
	Vec3 rgb = srcColor;

	// exposure and color filter
	rgb = rgb * m_linColorFilterExposure;

	// saturation
	float grey = Vec3::Dot(rgb,m_luminanceWeights);
	rgb = Vec3(grey) + m_saturation*(rgb - Vec3(grey));

	rgb.x = ApplySpacingInv(rgb.x,m_spacing);
	rgb.y = ApplySpacingInv(rgb.y,m_spacing);
	rgb.z = ApplySpacingInv(rgb.z,m_spacing);

	// contrast, filmic curve, gamme
	rgb.x = SampleTable(m_curveR,rgb.x);
	rgb.y = SampleTable(m_curveG,rgb.y);
	rgb.z = SampleTable(m_curveB,rgb.z);

	return rgb;
}
Additional Features
The list above is by no means exhaustive. One obvious missing feature is any selective color editing or hue shifting. Those features can of course be added.
If you add any features that have crosstalk between channels, then you will need to switch from 3x 1D LUTs to a single 3D lut. If you do, just make sure to be careful with your precision.
Another common feature to add is an additional 3D LUT for convolution. You could use whatever tools you like inside Nuke/Fusion/Photoshop/etc and bake the result into a 3D LUT. The workflow gets more complicated and you have to be very careful with your color conversions, but it is an approach that has served many games well.
And it is worth repeating that color correction is subjective. There is no right or wrong way to do it. That being said, the operations listed here should be a good starting point for most realtime applications.
Source Code
The souce code for these operations is available on GitHub under a permissive CC0 license. I often want to share small cunks of code but end up keeping it private because of the time required to package everything up cleanly. So that’s what the github account is for. Honestly, the code is not as pretty as I would like (and has a bunch of warnings that I’m too busy to fix) but it should give you a solid reference point for testing these ideas out. github.com/johnhable/fw-public
comments powered by Disqus
