
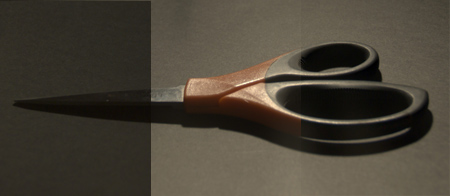
File this under things that people think is harder than it actually is. One thing I’ve got set up at home is the ability to use polarized light to split out the diffuse and specular components from real images. Artists spend lots of time looking at photo reference, but splitting the specular and diffuse really helps you understand a material. In the title image, the left is the diffuse light only, the middle is diffuse and specular light, and the right is specular light only. Btw, I’m not the expert here, but this is how I understand it.
-
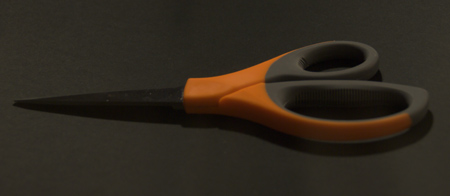
Original Image:

-
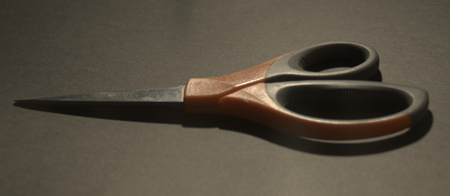
Diffuse Only:
-
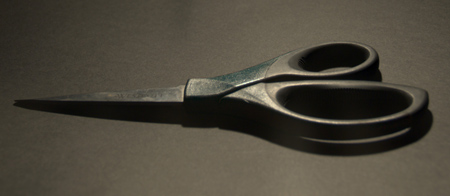
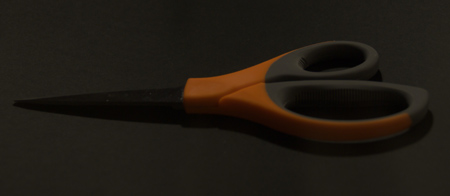
Specular Only:
If you want to do this yourself, you are going to need:
- A camera that lets you shoot in manual mode. I.e. an SLR.
- A remote shutter control so you can take multiple shots without touching the camera.
- A light source. I use a lamp from Ikea.
- Some polarizing film. I got mine from polarization.com. You want the “Fully Laminated Linear Polarizer Sheets”. Make sure you get a linear polarizer, not a circular polarizer.
At the most basic level, in computer graphics we assume that objects have both diffuse and specular reflectance. Here is some light hitting a surface with a nearby camera. By the way, this model is a huge over-simplification.
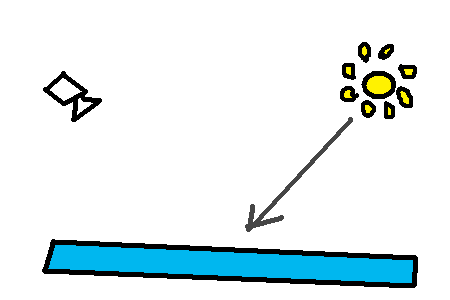
Some of the light that hits the surface will skip off the edge. If we have a white light and a blue surface, the light will remain white. We call this specular.
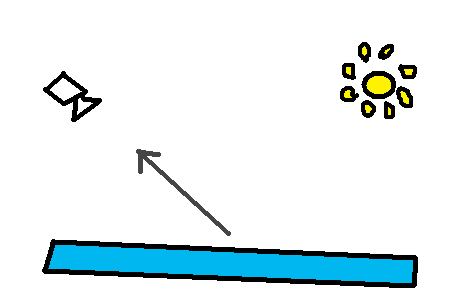
Some other light will be absorbed by the surface, some electrons will get excited, and a new photon will be emitted in a random direction. If we have a white light and a blue surface, this outgoing light will be blue. We call this diffuse.
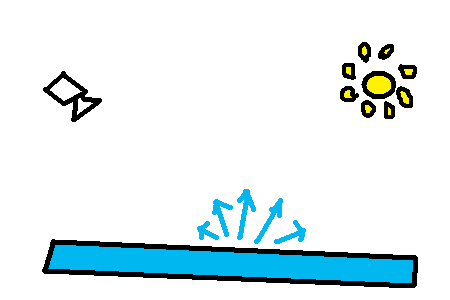
Hopefully, you already know that. If you didn’t, you do now. The cool thing is that light can be polarized. You can learn more about it from your good friend wikipedia. Additionally, specular light retains its incoming polarization but diffuse light does not. Since diffuse light is retransmitted in random directions with random polarization, we can say that it is unpolarized.
Here is the setup.
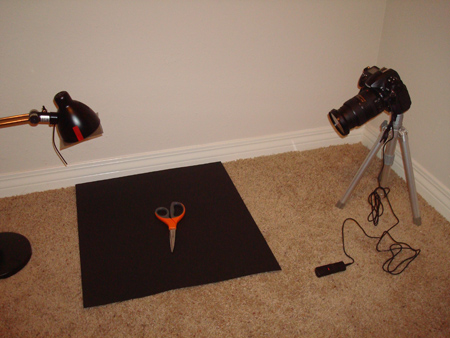
It’s pretty basic. I have a camera with everything set to full manual mode. That means:
- Manual Exposure
- Manual Aperture
- Manual White Balance
- Manual ISO
- Auto Focus Off
- Make sure the color profile is sRGB instead of Adobe 98
Also, you see that I have a remote shutter release. That way I can take multiple shots without touching the camera. If you have to touch the camera to take multiple shots, I guarantee you will have misalignment. And we have a light. Let’s take a closer look at that light.
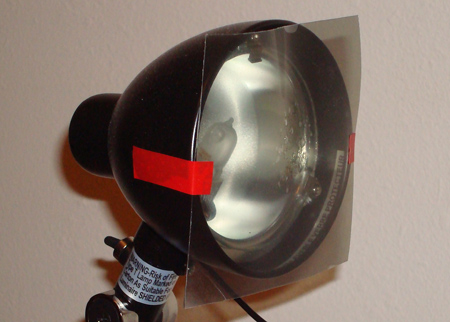
The light is just a halogen lamp from Ikea, but with a linear polarizer in front of it. I attached the polarizer with electrical tape because I’m a classy guy. As a warning, halogen lamps get pretty hot, so my polarizer has melted and warped a bit.
What we’re going to do is take two shots. But I’m going to hold a polarizer in front of the camera. Note that we have polarizers both in front of the camera and the light source. If you think I came to LA to be a video game programmer, you’re wrong. It’s just how I pay the rent while I pursue my dream of being a hand model.
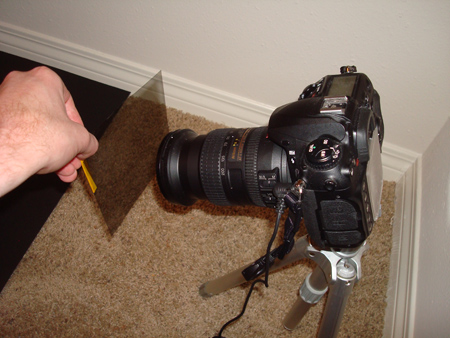
Notice the orange tape on the polarizer? I’m now going to rotate the polarizer 90 degrees and take another shot. Check out how the orange tape has moved.
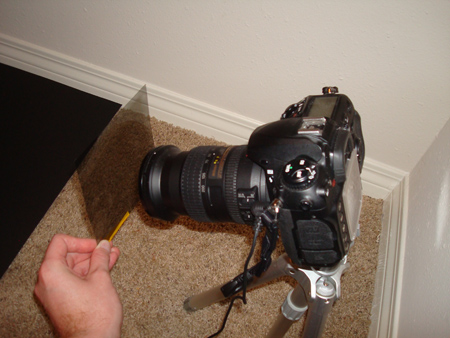
Here is what our first shot looks like. If our alignment is perfect, then we should have no specular in it. Of course, we usually will have a little because it’s impossible by hand to get our polarizers to align perfectly.
How does it work? Polarized light is hitting the surface. The specular light bounces off the surface and heads towards the camera. It hits the polarizer, which is aligned perpendicular to the polarization of the light, so it all gets absorbed by the polarizer. Meanwhile, the diffuse light that gets absorbed and retransmitted by the surface is unpolarized. The polarizer then absorbs half of that diffuse light, and the rest hits the camera. So that image has 50% of the diffuse and 0% of the specular. Now for the second image.
In this guy, the polarization of the specular light coming towards the camera is aligned with the polarizer, so all that light goes through. Meanwhile, the diffuse light is still unpolarized, so half of it gets absorbed. This image has 50% of the diffuse, and 100% of the specular.
If the first image is image A and the second is image B, the diffuse image is 2*A and the specular image is B-A. Of course, these images are stored with the sRGB profile. So here is the shader code to compare the two images and separate them out, and store the result as an sRGB image. As always, this code is not actually tested.
float LinearToSrgb(float val)
{
   float ret;
   if (val <= 0.0)
      ret = 0.0f;
   else if (val <= 0.0031308f)
      ret = 12.92f*val;
   else if (val <= 1.0f)
      ret = (pow(val, 0.41666)*1.055f)-0.055f;
   else
      ret = 1.0f;
   return ret;
}

float SrgbToLinear(float val)
{
   float ret;
   if (val <= 0.0f)
      ret = 0;
   else if (val <= 0.04045f)
      ret = val / 12.92f;
   else if (val <= 1.0f)
      ret = pow((val + 0.055f)/1.055f,2.4f);
   else
      ret = 1.0f;
   return ret;
}

int g_bSpecOrDiff;

float4 ps_main( float2 texCoord  : TEXCOORD0 ) : COLOR
{
   float3 srcA = tex2D(Texture0, texCoord ).rgb;
   float3 srcB = tex2D(Texture1, texCoord ).rgb;
   float3 linA = SrgbToLinear(srcA);
   float3 linB = SrgbToLinear(srcB);
   float3 linDiff = linA*2;
   float3 linSpec = linB-linA;
   float3 texDiff = LinearToSrgb(linDiff);
   float3 texSpec = LinearToSrgb(linSpec);
   float3 ret = g_bSpecOrDiff ? texDiff : texSpec;
   return ret;
}
If you do that right, your diffuse image should look like so:
And your specular image should look like this:
As you can tell, this process doesn’t work perfectly.
- You will usually have some extra specular in your diffuse-only image.
- Some objects don't behave nicely. In the specular-only image, the handle looks a little blue. I think that the handle might be dialectric which screws up the frequencies a bit.
- If your specular or diffuse image is clamping at 1.0, it will mess up those pixels. It's better to underexpose these image than to overexpose.
- Make sure you use a remote shutter or you will have alignment problems.
Hopefully that wasn’t too much trouble, and you can do specular/diffuse separation yourself. Whew, long post.